
In today’s blog post, we are going to talk about 10 Best Adsense Alternative Websites, using which you can instantly monetize your website, that too any type of website. If you write content with the help of AI, then also you can monetize your website by using them. If you like this blog post, then do tell us in the comments.
What Is Adsense Alternative Website
When we create any type of website, we want our website to be approved by Google Adsense and Adsense ads should run on our website and we can earn money, but due to some rules we are not able to get approval, then we can get approval by using these websites and by monetizing our website, we can also run ads and earn money.
Top 10 Best Adsense Alternative Website
- Adsterra
- Monetag
- Monidead
- Hilltop Ads
- Net Pub
- Pop Ads
- Traffic Star
- Glaxino
- Taboola
- MGID
Adsterra
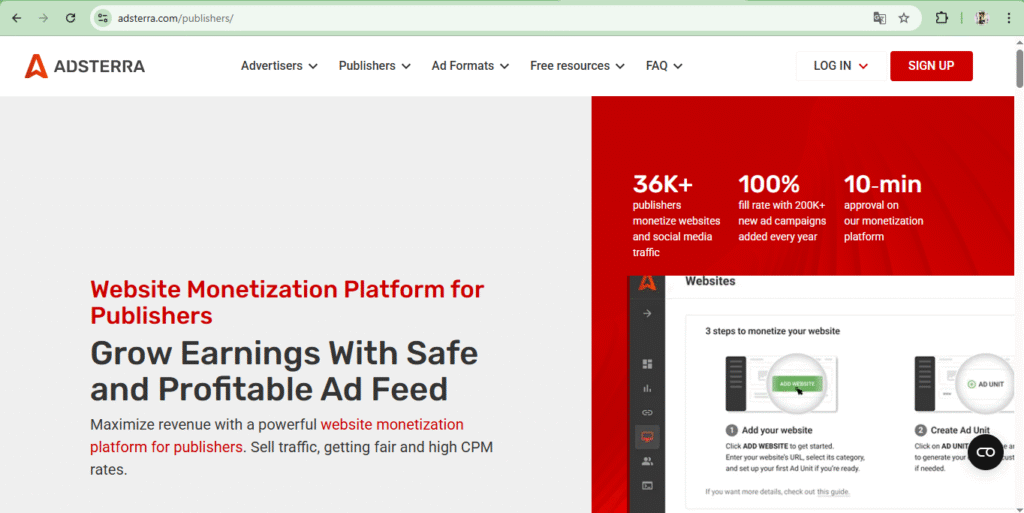
Everyone knows about this website, whoever does blogging, they all know about this website, this is an AI powered website, by using which you can instantly monetize any kind of website on your WordPress and Blogger and can also place instant ads, all its information is given below, by following which you can create your account and after getting your website approved, you can place ads on your website.
- First of all, you have to search Adsterra in your browser. You will find the first website and open it.
- Here you can create your account in two ways, first is in Advertisement and second is in Publisher. If you want to advertise your website, then you can create your account in Advertisement and to monetize the website, you have to create your account in Publisher.
- Now after the website opens, you will see the sign up option at the top. On clicking it, you will see two options. You have to click on your career account in Publicer and you have to set your Gmail and password and click on the create account option.
- As soon as you click on Create Account, you will receive an email on your Gmail account through which you have to verify your account. Now your account will open in front of you. You will see the option of Add Website at the top of it. You have to add your website by clicking on it.
- After adding, you will see a code to verify your website’s ownership. Copy this code and paste it into the header section of your website. Return to Adsterra and click on Verify. This will verify your website and approve it within 10 minutes.
- Now after getting the approval, you have to click on the Ads Code option and the type of Ads you want to place, here you get to see Social Ads, Banner Ads, Popunder Ads and Software Download Ads, whatever Ad you want to place on your website, you have to select that Ads, click on the Generate Code option and after generating your code, place the code wherever you want to place it, wherever you want to show the ad, you have to place it there on your WordPress website or Blogger website, so in this way you can setup your Adsterra account.
- Now after doing all this, as soon as you complete $100 on Adsterra Par, you can transfer your amount to Paypal and bank account.
In this way, whether it is a Blogger website or a WordPress website, you can get both types of websites approved from here and earn by placing ads. In this, you get to see CPM and here you get to see CPM ranging from $1 to $15.
Monetag
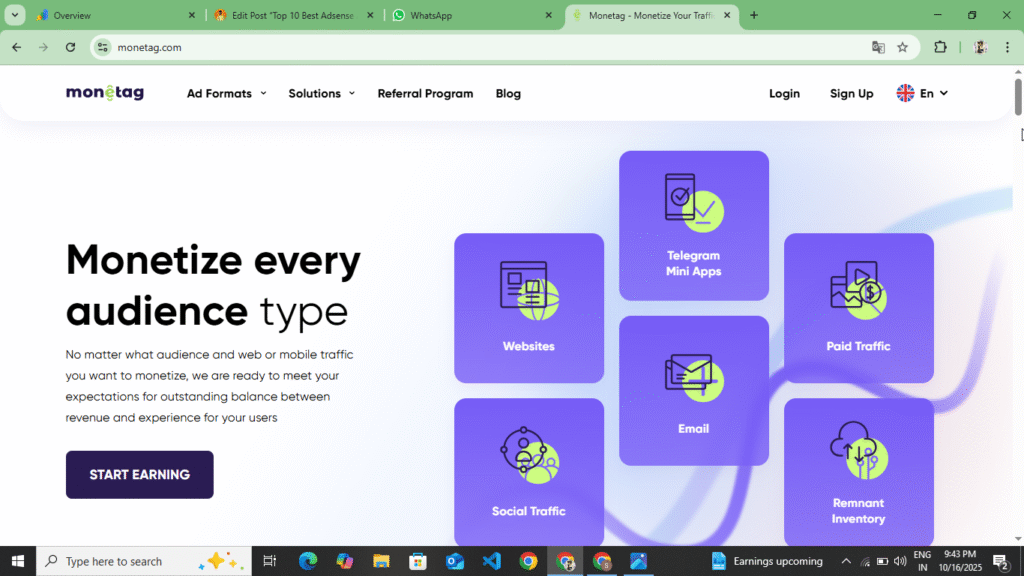
You can also monetize your website by using this website. This is an AI powered website which is run by Propeller Ads company. This is a brand new website. In this you can see CPM up to $1 for India and up to $100 for USA. Here you can see a minimum CPM of $40 for USA, but you cannot monetize your Blogger website on this. You can only monetize your WordPress website on this. You can get instant monetization by using this website. Here you can see In Page Ads, Pounder Ads, Multiple Ads, Social Ads, Direct Link. You can also see Social Ads here. If your website gets high quality traffic, then you can use it. You can also withdraw up to $5 on this. Information on how to get approval and how to create an account is given below.
- First of all, you have to search Monetag in your browser and open the first website you find.
- Now you will see the sign up option at the top, you have to click on it, as soon as you click, a complete form for creating an account will open in front of you, now you have to carefully fill all the information asked in the form, first of all you have to enter your name, mobile number and from where you came to know about this website and click on the create account option.
- Now as soon as you click on the Create Account option, you will receive an email on your Gmail, through which you have to verify your account. In this, you have to keep in mind that you can create only one account from one IP address, you cannot create multiple accounts in it.
- Now after doing all this, you will see the option of Add Website, in that you have to enter the URL of your website and click on the option of Next. Now you have to verify the ownership of your website, which you can verify by Meta Code, Plugin and also by uploading a file in the root directory.
- Now you need to verify your website’s ownership using one of these three methods. As soon as you verify ownership, your website will be approved and verified here.
- Now after getting verified, you have to generate your Ads Code. Here you can also see Ads with High CPM and if you do not want to place multiple ads and want to show complete Ads in one code, then here you will get the option of Multiple Ads. From there you have to generate the code and paste it in the Head Tag of your website, due to which your Ads will go live and you will start earning based on the impressions of every user who comes.
- Now you can transfer your payment on the basis of any method, here you can transfer it to Paypal, Payoneer, bank account and you can also request the method by which you want to withdraw your amount and you can also earn by joining the referral program here.
So in this way you can create a Monetag account and get your website monetized. In this you have to keep one special thing in mind that if your website gets low quality traffic then you should not take its approval on your website because in this you get more account retention and if you create multiple accounts on the same IP then also your account gets blocked.
Mondiad
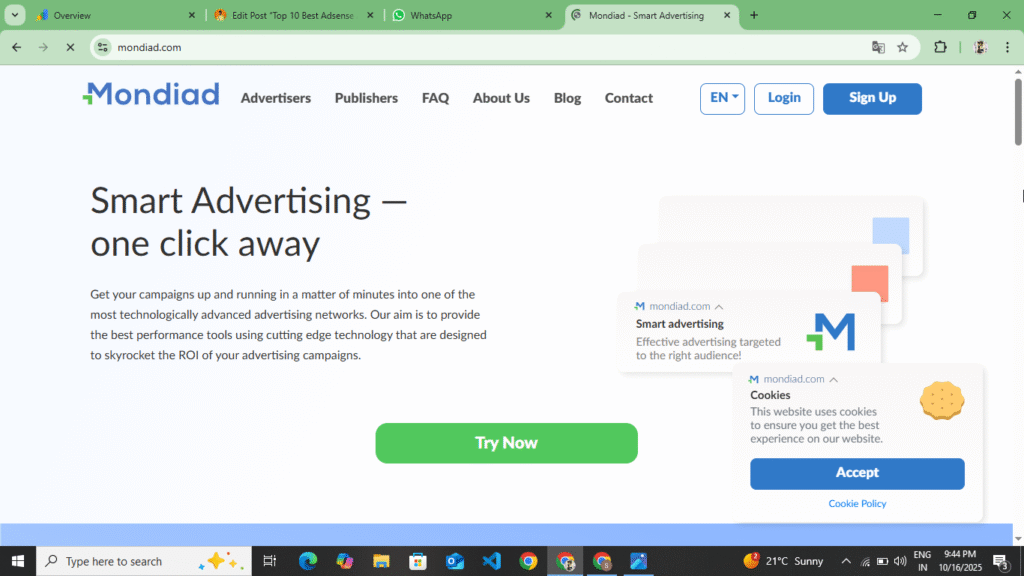
Mondiad Ads Network is like Monetag and its ads are also like Monetag. In this, you get approval on your website easily and you can also verify the ownership of your website easily. In this, you get a minimum withdrawal of up to $5. Here you also get to see less than $5 to $7. In this, you get to see Social Ads, Banner Ads, Native Ads and Popunder Ads. In this, you can instantly monetize your website, setup ads and make them live and generate revenue by monetizing your traffic. In this, how to create your account, how to approve your website and how to verify the ownership, then follow the following points.
- First of all, you have to search Mondiad in your browser and the first website you will find is to click on it and open this website.
- Now you will see the option of Create Account on the top side, you have to click on it, as soon as you click, you have to click on the option of Publicer there, then a complete form for creating an account will open in front of you.
- Now in that form you have to enter your Gmail ID and password and the URL of your website which you want to monetize. Even if you do not have a website, you can do earning from here. Here you get a smart link, you can also generate revenue from here by promoting it.
- Now after doing all this, you have to click on the Create Account option and create your account. Now you will receive an email on your Gmail, through that email you have to verify your account. After verification, you have to verify the ownership of your website.
- To verify the ownership, here you get to see two methods, one is that if you want to verify your website by putting Meta Code below the Head Tag, then you have to copy the code and paste it in the Head Tag of your website and if you do not want to do this then you can install the plugin in your WordPress website, you can verify from there and setup the ad and make it live.
- If you do it manually, then after verifying the ownership in your account, you will see the option of Generate Code. From there, you have to generate the code for Social Ads, Banner Ads, Native Ads and Popunder Ads and place it on your website, so that your ads will go live.
- Now, after the ad is live, any user who visits your website will see those ads and based on their impressions, you will receive revenue. You can transfer that revenue to your PayPal account and bank account.
In this way, you can get your website approved on Mondiad and get it monetized, create your account and generate a good revenue and in this you also get to see a CPM of up to $5, in this your earning will be based on impressions and if your ads get clicked then your earning will also double and here as soon as your revenue of $5 is completed then you can transfer this revenue to your Paypal and bank account.
Hilltop Ads
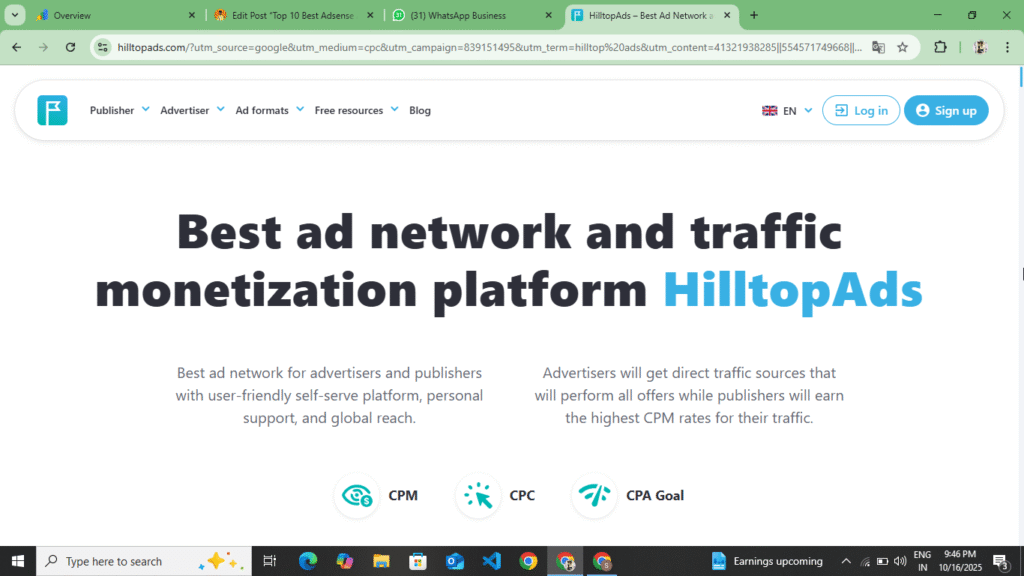
This is an AI powered website. In this, you can get instant approval for your WordPress website and Blogger website and you can generate revenue by making ads live. In this, you get Banner Ads, Popunder Ads, Native Ads and Display Ads and along with this, you also get to see Video Ads. In this, you get to see Highest CPM of $10 to $15 and a minimum CPM of $5. If your website gets traffic from USA, then this is a better website than all the websites. Here you can easily get approval, that too instantly. Here you can monetize any type of website and start earning by making ads live. Here you do not need traffic and any type of traffic, quality traffic, even low value traffic, comes, then you can generate revenue from here and transfer it to your paper and bank account. Here you can transfer revenue up to a minimum of $5 to your PayPal. How to create your account in this To know how to get the website approved and how to add it, along with how to verify the ownership, read the following points carefully.
- First of all, you have to open your browser and search for Hilltop Ads in it. As soon as you search, you will find a website there, you have to open that website.
- Now after opening the website, you will see the sign up option at the top, you have to click on it, now a complete form will open in front of you, if you want to create your account with your Gmail, then you have to enter your Gmail password and you can also create your account by continuing with Google.
- As soon as you create an account, you will receive an email on your Gmail. You have to verify your account through that email. After verification, you will see the option of Add Website at the top. Click on it. After clicking, you have to enter the URL of your website and click on the option of Next.
- Now two options are open in front of you, firstly you will verify the ownership of your website through Meta Tag and by uploading a file in the root directory file, apart from this you can do it by installing it in WordPress website and in the blocker website you have to verify your account and website through Meta Tag.
- Now, after verifying your website, you need to generate your ad code. From here, you can generate the Video Ads, Display Ads, Native Ads, and Popunder Ads code and place it on your website, so that your ad will go live and start showing on your website.
- Now after doing all this, to withdraw your payment, you have to go to Payment & Billing, there you can transfer the amount by entering Paypal Gmail and bank account number, as soon as $5 is completed then
Now, in this way, you can get approval for your website on Hill Top ads and verify the ownership of your website by creating an account. Here, you get to see a minimum CPM of $5 and a maximum CPM of $10. You also get instant approval here easily and there is no requirement of any kind of traffic. Even if your website gets valuable quality traffic, you can easily get approval and generate revenue from here.
Net Pub
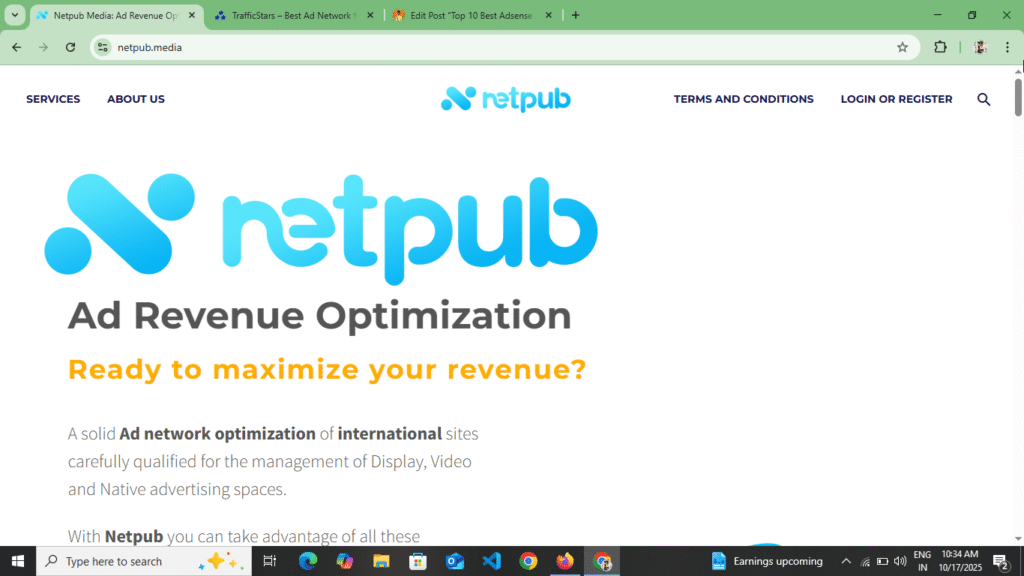
This is also an AI powered website. You can monetize your website by using this website. The website approval process in this is similar to Adsense. The way your website gets approved on Adsense, it gets approved in this way. To get your website approved on this, there should be Privacy Policy, Contact Us, About Us, Terms and Condition and Disclaimer pages on your website. Along with this, it is necessary to have some traffic on your website, only then your website can get approved, otherwise they do not give approval on your website and there should also be valuable content on your website. If there is no valuable content, then your website is not approved here and there should not be AI content written on your website. If you want to get your website approved using this, then read the following points.
- First of all, you have to search Net Pub in your browser, then a website will open in front of you, you have to open that website, as soon as you open it, the official website of Net Pub will open in front of you.
- Now after opening, you will see the sign up option at the top, you have to click on it, as soon as you click, a complete form will open in front of you, you have to fill all the information asked in the form carefully.
- First of all, you have to enter your Gmail, then enter the password and after that enter your contact WhatsApp number or Telegram username and click on the Create Account option. As soon as you click on the Create option, you will receive an email on your Gmail. By clicking on that email, you have to verify your account and open your account.
- Now after opening the account, you will get to see a Dashboard option, below that you will see the website option, after clicking on it you have to click on the Add New Website option and enter the URL of your website and enter the domain of your website and after entering the domain you have to click on the Next option.
- Now as soon as you click on the Next option, the option to verify ownership will open in front of you. Now in that option, you will see two options, one will be that you can verify the ownership by placing the Meta Code of your website below the Head Tag and you can also verify your ownership by uploading the root file.
- Now, as soon as you verify your ownership, your website goes for approval and you get approval within two to three days. If your website has valuable content and traffic, then your website gets approved here within a day, otherwise your website may also get rejected.
Now in this way, you can get your website approved here and monetize your website. Here you get to see Highteast CPM ranging from $5 to $6 and the minimum here you get to see is as low as $0.5. Here you get to see E-CPM and in this, when your $100 is completed, then you can transfer your payment to Paypal and bank account. In this, first of all, when your $100 is completed, then first of all your payment remains on hold for 2 months, after that you can withdraw your amount in your bank account.
Pop Ads
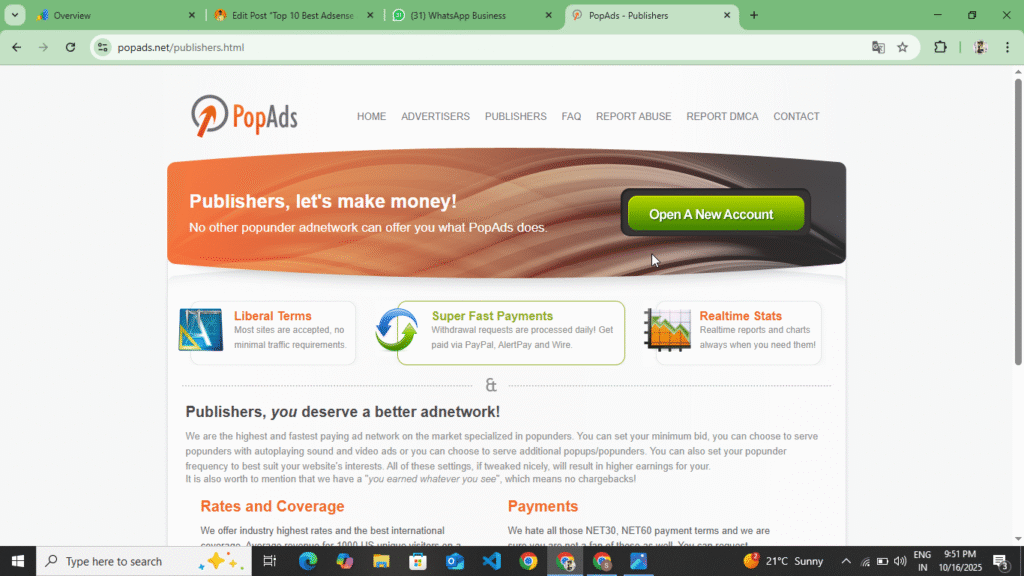
This website is the oldest website, here you can get approval for any type of website and here you get to see only one ads format, Popunder Ads and in this, as soon as your amount reaches $5, you can transfer it to your Paypal and bank account. This website provides you weekly payment, here you can get approval for any type of website, that too instantly and along with this, you also get the option of smart link here, even if you do not have any type of website, you can generate revenue from here by promoting smart link. In this, if you want to create your account and get your website approved, then read the following points.
- First of all you have to search Pop Ads in your browser, as if you search this then the first website will appear in front of you, you have to open that website, after opening it a very simple website will open in front of you, here you can create your account in two ways, if you want to give any kind of advertisement then you have to create your account in Advertisement, if you want to monetize your website then you have to create your account in Monetize or Publisher
- Now, if you want to create your account on Publicer, you need to select your username, then enter your Gmail, and then enter your mobile number. If you don’t want to enter your mobile number, you can enter your Telegram username and create your account after following their privacy policy.
- As soon as you create your account, you will receive an email on your Gmail. You have to verify your account by opening that email. As soon as you verify your account, your account will be verified and the dashboard will open in front of you. Now there you will see the option of Add Side.
- Now click on the Add Website option and enter the domain and URL of your website and click on the Next option. As soon as you click on the Next option, you will be given a Meta Tag to verify the ownership. You have to paste that Meta Tag in the Head Tag of your website and verify your ownership.
- Now as soon as you verify your ownership, your website will be approved after 10 to 15 minutes and you will receive an email. Now you have to open your account and refresh it once, then your website will be approved. Now you will see the option of generating Add Code. After clicking on it, two options will open in front of you in which you will be given different codes, one code will be Software Ads and the other will be Popunder Ads. So you have to copy the Ads Code of the ad you want to place and place it on your website.
- Now as soon as you place that code on your website, instant ads will go live on your website and wherever someone clicks on your website, ads will open in front of them because it provides you Popunder Ads.
So this way you can get your website approved/monetized and create your account and get your website approved and verify the ownership. Here you get to see Highteast CPM of $5 to $6 but in this you get to see India CPM of only $1 to $1.5 and in this you can transfer your payment to Paypal and Bank Account. It provides payment twice a week and that too $5.
Traffic Stars
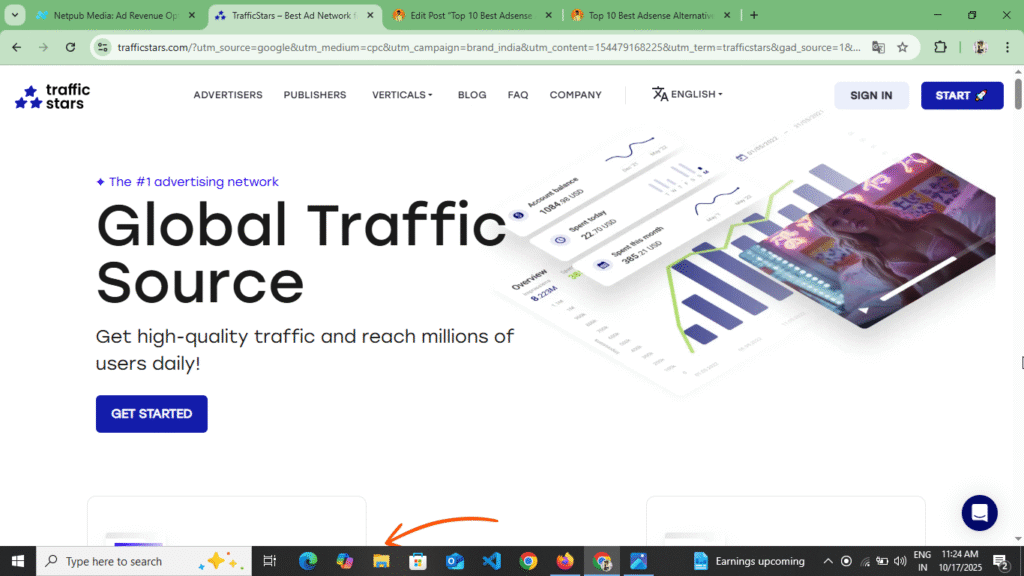
Traffic Stars is a premium ads network. Here you can create your account in two ways. If you want to promote your website and generate traffic and leads on your website, then you can use its advertisement panel. And if you want to monetize your website, then you can monetize your website by creating its publisher account. In this, you get to see the highest CPM of $5 to $7 and the minimum CPM is one to two dollars. In this, you get to see In Page Ads, Display Ads, Popunder Ads and Video Ads. If you want to create your account in it and want to monetize your website, then read the following points.
- Now first of all you have to search Traffic Stars in your browser, as you search, you will first get the website, you have to open that website.
- Now after opening the website, a full website will open in front of you, on top of that you will see the publisher option, click on it and go to the publisher’s dashboard, there you will get to see all the information, what type of ads are available, how can you get your website approved.
- Now you will see the Sing In option at the top, you have to click on it. As soon as you click, a complete form will open in front of you. Fill in all the information asked in that form like Gmail ID, User Name, Password and their Captcha and click on the Create Account option. As soon as you click, you will receive an email, through that mail you have to verify your account.
- Now after verifying the account, you will go to their publiciser dashboard, there you will see the option of Add website, after clicking on it you have to enter the URL of your website and click on the option of Next and you have to verify the ownership on your website, for that you will get to see two options here, first you will get to verify your website through Meta Tag, if you want to do it by uploading it in the root file then you can select that also.
- Now select any of these two options to verify your website’s ownership. As soon as you verify ownership, your website will go into review and you will have to wait for one to two days, after which your website will be approved.
- Now after the website is approved, you will see the option of Generate Ads Code. By clicking on it, you have to generate the Ads code and place it on your website and make the Ads live.
- For example, if you generate the Ads code and place it on your website, then the Ads will become live on your website and now you will see the Billing & Payment option to withdraw your payment. By clicking on it, you can see when your payment will come to your bank account and you can transfer your account amount to Paypal and bank, like when $1 is completed then
In this way, you can get your website approved through Traffic Star and monetize the traffic coming to your website. Here you get to see a CPM of up to $5 and in this, no spam is done on your website and your website keeps on ranking easily on Google. You just have to keep in mind that when you go to get it approved, then pages of Privacy Policy, Contact Us, About Us should be made on your website and there should not be any kind of violation, only then your website will be approved here.
Galaksion
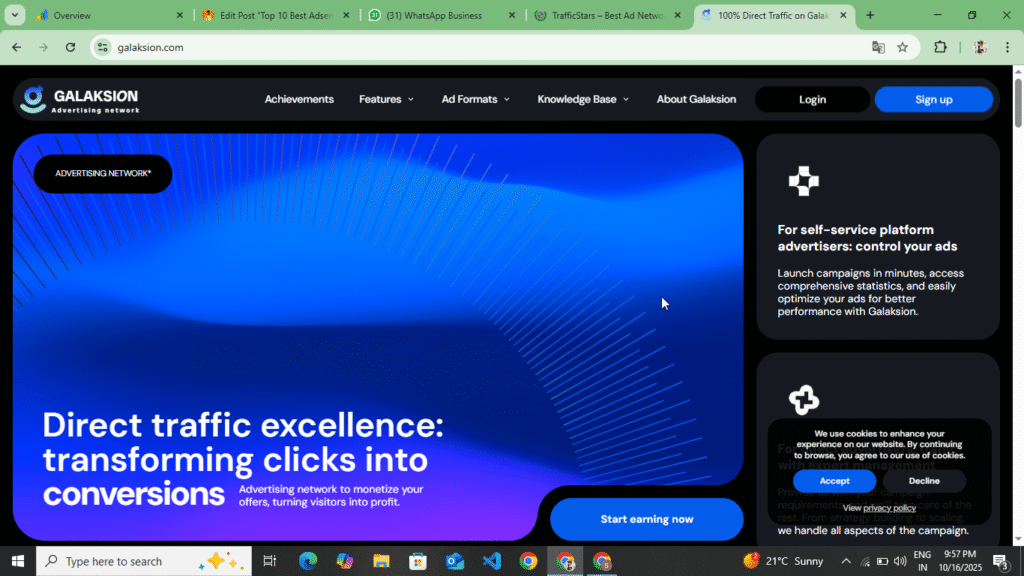
This is also an AI-powered website that you can use to monetize your website. You can see Banner Ads, Social Ads, Popunder Ads, and Native Ads. The approval method is similar to that seen in Monetag. First, you need to create your account with Publisher and verify it. After adding your website and verifying ownership, your website goes into review and is approved within 2 to 4 days. After that, you can make the ads live and start earning. This way, you can monetize your website. You can see a CPM of $5 to $7. If you want to promote your website and generate leads, you can use this website. The following is information on how you can create your account and get approval.
- First, open your browser Glaksino You have to search and you will find the first website, click on it and open it.
- Now as soon as you open it, their advertisement panel opens in front of you, you will see the publisher option at the top, by clicking on it you will go to the official website of the publisher, now there you will see the sign in option at the top, you have to click on it, as soon as you click, a form will open in front of you, you have to read all the information asked in the form carefully, there you have to enter your Gmail, the URL of your website and your chat support like Telegram or WhatsApp number and after expecting their terms and conditions click on the create account option.
- Now as soon as you click on the Create Account option, you will receive a Gmail on your mail. You have to open that Gmail and verify your account.
- Now after your account is verified, the website URL that you had entered while filling the form will be visible in the website field, there you have to verify the ownership of your website. To verify the ownership of the website, you get to see two methods here, first is that if you want to verify your website from the root file, then select it, if you want to use Meta Tag, then select it and verify the ownership of your website through them.
- Now, after verifying the ownership of the website, your website will go under review. After going under review, your website will be approved within two to four days. As soon as the website is approved, you can generate the Ads code from here and place it on your website and make the Ads live on your website.
- Now after the ad goes live, you will start earning from the visitors who come to your website. As soon as the earnings reach $5, you can transfer them to your Paypal or bank account.
So in this way you can get your website approved from Galaktion and if you want to give advertisement then you can also give advertisement by creating your account in advertisement and here you can also see CPM ranging from $5 to $15 and here you get to see the highest CPM of USA.
Taboola
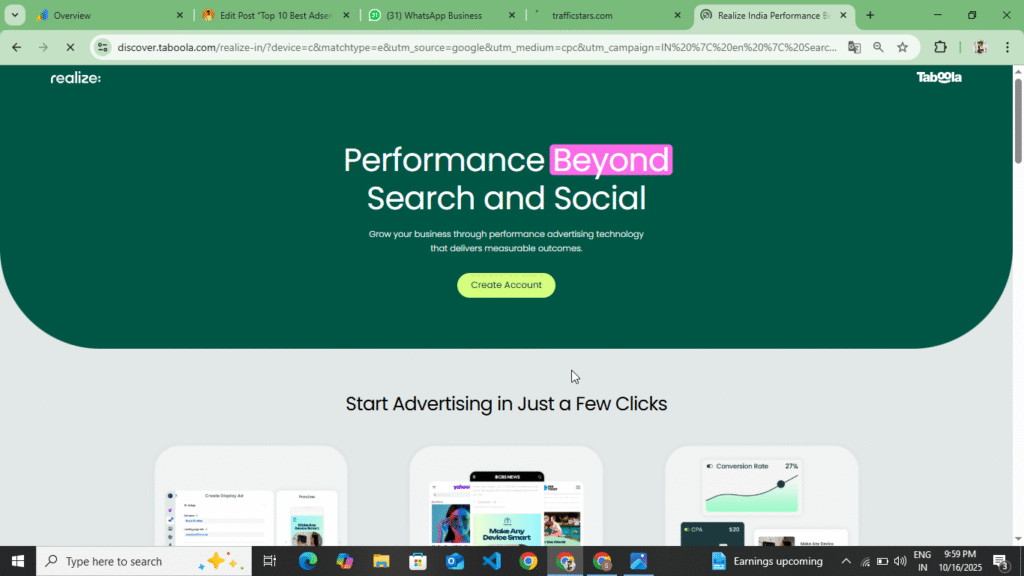
This is an AI powered website, using which you can get your website approved. To get your website approved from this website, it is necessary to have 2 million traffic on your website, only then you get approval here. Here you get to see ads just like Google Adsense. Here you get to see Stacky Navigation Ads, Banner Ads, and Interstitial Ads, Display Ads and here you get to see the highest CPM of $5 to $15. In this, you have to contact the company to get approval, after that you get approval here. If you want to create your account on this website and want to monetize your website, then follow the following points.
- First of all, you have to search Taboola in your browser. As you search, you will see the first website there and you have to open that website.
- Now, upon opening the website, you get to see their advertisement panel. At the top, you get to see the publisher option, you have to click on it. As soon as you click on the publisher option, a publisher’s dashboard will open in front of you. There, you will get to see all their ads, what types of ads they provide, and here you will also get to see which company’s ads you get to see.
- Now you will see the option of Contact Us at the bottom, you have to click on it, as soon as you click on it, a form will open in front of you, now you have to fill all the information asked in the form carefully, there you have to enter your Gmail Contact Number and Telegram Username and click on the Contact option.
- Now after doing all this, the company will send you an email on your Gmail, after that you can talk to this company through mail, you have to answer whatever they ask you, they will ask for Google Analytics data from you and you have to add the Gmail given by them on Google Analytics to your traffic.
- Now after taking complete information of analytics, you will be given approval after that if there is 2 million traffic on your website in 1 month then you will be given this approval and after that you will be given an account through which you can generate your ads code and can make those ads live by placing them on your website.
- You will now see the Billing & Payment option in the Publisher Dashboard. You can withdraw funds by entering your bank account number and PayPal Email address. This allows you to withdraw a minimum of $100.
This website works just like Google Adsense and when your $100 is completed then your payment is held for a month after which it is withdrawn to your account. In this website you get to see CPM and RPM ranging from $5 to $10. Here you get to see the ad industrial ad with the highest CPM and if your website goes to Google Discover then you get instant approval here.
MGID

This website is the oldest website and it is from the time when Google Adsense came. To get approval here, it is necessary to have valuable content on your website and there should also be traffic on your website. If you write the content with the help of AI, then it will not give you approval. If your website also has Google Adsense approval, then it can give you approval and by placing its ads along with Google Adsense ads, you can double the revenue and in this you get approval in two to three days. Here you have to use Ads Txt to verify the ownership of your website. If you want to get approval on this website or want to create an account, then follow the following points.
- First of all, you have to search MGID in your browser. As you search this, you will get the first website in front of you. Click on it and open that website.
- Now as soon as you open it, you will see a very simple website here. First of all, you will see their advertisement panel. Now towards the top header, you will see the publisher option, click on it.
- Now after clicking on the publisher option, the entire website of the publisher will open in front of you. In that website, you can see what type of ads you get to see here and here you get to see RPM combined with CPM. Here you get to see RPM up to a minimum of $12.
- Now to submit your website for approval, you will see the Sign In option at the top, click on it. Now you will see two options in front of you, Publisher and Advertisement, so you have to click on the Publisher option. As soon as you click on it, a form will open in front of you. You have to fill all the information asked in the form carefully. First of all, you have to fill your first name, then last name, Gmail and URL of the website and how much traffic is there on the website, expect their privacy policy and click on the Create Account option.
- As soon as you click on the Create Account option, you will receive an email on your Gmail. You have to verify your account through that email. Now, after verification, a dashboard will open in front of you. At the top, you will see the Add Website option. By clicking on it, you have to enter the domain of your website there and click on the Next option.
- Now after clicking on the Next option, you will see Ads Txt here, you have to place that Ads Txt on your website and verify your ownership. As soon as you verify your ownership, your website will go into review. Now you have to wait for a day or two. Your website will be approved and will appear in front of you if your website has valuable content, valuable traffic and follows all the policies.
- Now after the website is approved, you will see another Ads Txt here, you have to copy that Ads Txt and place it on your website, as soon as you add that Ads Txt, you will see these ads in the posts of your website, now as traffic comes to your website, you earn through those ads.
- Now after earning, you have to verify your account through your PAN card. Now as soon as your $100 is completed, that $100 will remain on hold for one month, after that it will be withdrawn to your bank account and Paypal.
So in this way you can get your website approved on MGID and verify your account. Here you cannot create multiple accounts. You get to see only one account on one PAN card. Here, if your $100 is completed first, then that $100 remains on hold for a month, after that you can withdraw it in your bank account and through Paypal and can also talk to them. Here you get to see RPM along with CPM and here you get to see the highest RPM of $25 to $30 and the minimum RPM is also up to $10.
Some Words This Post
All these websites provide 100% payment and are genuine websites. You do not see any kind of fraudulent activity in these websites. If you get your website approved from here in the right manner and do not do any kind of SPAM, then you earn 100% here and you can withdraw that earning in your bank account and Paypal. There are some websites in these websites where you have to give quality traffic and some websites provide you payment even without quality traffic. If you do any SPAM on these websites, then your account will be blocked and you cannot add that website on them ever nor can you approve it. If you get it approved, then your website will be blocked again and the account will be rusticated. So in this way you can get approval from here. You can get instant approval from these websites.
Disclaimer :- These websites are not a promotion or sponsorship of any kind. These reviews are written solely to provide information to users. Users who are unable to get Google AdSense approval can use these websites to monetize their websites and generate revenue.